Nutanix CE has a bunch of powerful features, and new ones are coming out all the time. Some of them, however, require the CVM to have additional RAM in order to work properly.
For example, in version 5.0 of both the commercial and CE product, Nutanix added a cool new self service portal that provides great multi-tenancy features as well as self service file restore straight to your internal customers. This portal, however, requires at least 24Gb of RAM. Other features, such as DeDupe or replication also recommend an increase in CVM memory.
As these features come out, you may need to increase the amount of RAM that your CVM has access to. Unfortunately there is no way to do this through the GUI on CE. Here is how you can quickly get this done via CLI.
- Connect via SSH or console to your Nutanix Host system (not your CVM). The default login is:
username: root
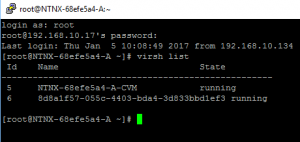
password: nutanix/4u - We need to get the name of your CVM onto our clipboard. You can do this via Prism, or just run the below command, which will list all of the VMs on that host. Just copy the name of your CMV once you run this:
virsh list

- Turn off your CVM like so:
virsh shutdown your-cvm-name-here - Change the memory by running these commands:
virsh setmaxmem your-cvm-name-here 24G –config
virsh setmem your-cvm-name-here 24G –config
Note the 24G in the above commands is to increase memory to 24 gigabytes. If you wanted to change it to 8 gigabytes, for example, it would look like this:
virsh setmaxmem your-cvm-name-here 8G –config
virsh setmem your-cvm-name-here 8G –config - Turn your CVM back on:
virsh start your-cvm-name-here
That’s it! If you have any trouble with this, comments, or questions, feel free to post below.
Categories: Datacenter Homelab Hyperconverged Virtualization

1 reply ›