
![]() I’ve been meaning to setup a box running Nutanix CE for a while. I’m not going to use it for my “production” services at home, because I don’t need 3 nodes, and 1 node doesn’t provide me with any fault tolerance. That said, I thought I might be able to use it for customer demos, presentations, and lab type activities. I especially want somewhere to play around with AHV.
I’ve been meaning to setup a box running Nutanix CE for a while. I’m not going to use it for my “production” services at home, because I don’t need 3 nodes, and 1 node doesn’t provide me with any fault tolerance. That said, I thought I might be able to use it for customer demos, presentations, and lab type activities. I especially want somewhere to play around with AHV.
I have an IBM TS140 hanging around, which I talked a bit about here. I decided to try and get CE up and running on that system. There are just a few things to sort out for it to run properly, so here are the details on how you can do the same with minimal fuss.
Hardware – Your system needs a couple upgrades that didn’t come in the default configuration.
- A solid state drive. This is supposed to be at least 200GB. I used this one, which was inexpensive at the time ($54.99).
- My TS140 came with a 500GB Hard Drive. That is the minimum recommended size, and plenty for my demo needs, so I went with it. You may want to increase yours.
- More RAM. I think most of these come with 4GB or 8GB. You need a minimum of 16GB to properly let the CVM run. I have 32GB in mine.
BIOS – there are some factory BIOS settings that need to be changed in order for the TS140 to install CE.
- The TS140 won’t boot without a keyboard attached. Who ships a “server” like that? You need to fix that straight away. You’ll find it on the startup tab. Change to “enabled”.
- You need to disable TPM, or you’ll get a TPM error when installing Nutanix. There are 3 states available for TPM, which you’ll find on the Security tab. Change it to “disabled”.
– The error I got was: “A TPM error (6) occurred attempting to read a pcr value”. This error went away once TPM was disabled. - You need to enable VT-x support. Change it to “enabled”. If you don’t do this, you’ll get through the whole install before seeing an error. Doh!
Install
Follow the instructions laid out in this document to create a bootable image on a USB stick or similar, and to get the install started.
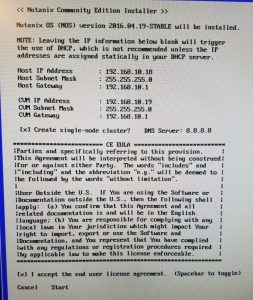
Once the installer boots up, you’ll get a screen that looks like this to enter your IP addresses. Make sure you check the “single node cluster” box if you are building a single node cluster. One thing to note is that you have to actually scroll down through the EULA before you can continue with the install. It will let you click “start” but then on the next page makes you come back and scroll down. Kinda weird.
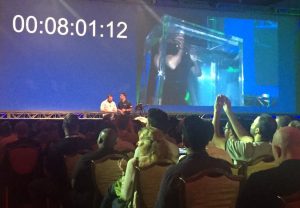
The install will take a while to finish, for me it took quite a bit longer than the 8 minutes that David Blaine held his breath during their CE install at .NEXT in Las Vegas this year.
If you are doing a single node cluster like I was, SSH into your new CVM and create the cluster, like so:
nutanix@cvm$ cluster -s cvm_ip -f create
Now, log in via Prism by entering your CVM IP into your web browser. Login with the default credentials, which are:
user: admin
pass: admin
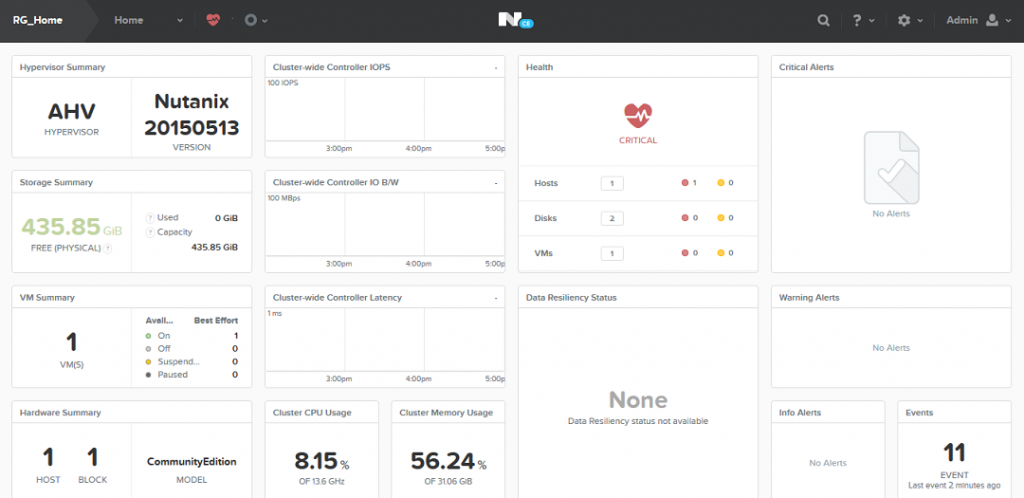
It will look like the image below. Why do I have a critical health alert? Because I rebooted the system, and it tracks reboots.
Everything load OK? Great! Create a new VM!
- From the top menu, select “VM”
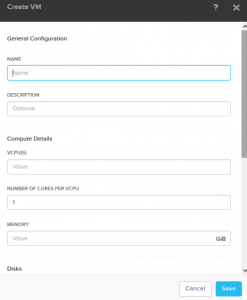
- On the right, you’ll see a button labeled “+Create VM”. Click it!
- You’ll be presented with a screen to enter some details. Pretty much all you need to do is add a disk and specify the size.
- When you add a NIC, it will ask you to create a new network the first time you do this. After that, you won’t have to. You can just use VLAN 0 for the native VLAN.
You are good to go! If you have any trouble getting this running, feel free to comment below.
Categories: Datacenter Servers Virtualization
Hi Rick.
Good Article. I have installed CE on a Intel Skull Canyon. I created a VM, but really struggling to present guest tools to the VM. Have you come across this issue?
I haven’t actually tried to use the guest tools in a CE environment. Are these Windows VMs or Linux? If Windows, I assume you installed the VirtIO driver? Out of curiosity, what capability are you trying to get from the guest tools?